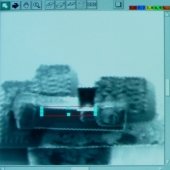
NOTE: It is very important that you are focused and registered at this step.
1. Click Get Image. At Area x Zoom = 256 x 8, focus and register M1-200.
2. Use the SPUTTER TOOL to draw a rectangular box with the following parameters:
- Dimensions: ~11 x 2
- Time: At least 4 min. per edge
- Scan: see image below.
![]()
Repeat for the lower edge of the protective pad.
NOTE: Repeat the two preceding steps as necessary, alternating the mill on the upper and lower edge on the taper only, until specimen thickness measures 1 µm.
3. At Area x Zoom = 32 x 2, focus and register M1-100.
4. Repeat steps 2 -3 until the specimen is 0.6 µm.
5. Focus and register M1-50.
7. Focus and register M1-50 or M0-50.
8. Final milling:
8.1. Change to Area x Zoom = 32 x 1.
8.3. Enter 1 degrees to tilt.
8.4. Change area to Area x Zoom = 32 x 2 and Speed: 5. Use the SPUTTER TOOL to draw a rectangle with the following parameters:
- Dimensions: ~11 x 0.5
- Time: At least 4 min. per edge
- Scan: see image below (away from edge).
![]()
Correctly position the box on the upper edge.
8.5. Change Area x Zoom = 32 x 8 and press Fabrication Start. Run the mill many times to check the edge. Run until the specimen is ~70 nm.
NOTE: After changing the Area x Zoom to 32 x 8, only adjust the box VERTICALLY.
8.6. Change to Area x Zoom = 32 x 1 and Speed: Rapid.
8.7. Under the Stage menu, enter -1 degrees to tilt.
8.8. Change area to Area x Zoom = 32 x 2 and Speed: 5. Use the SPUTTER TOOL to draw a rectangle with the following parameters:
- Dimensions: ~11 x 0.5
- Time: At least 4 min. per edge
- Scan: see image to the left (away from edge).
REMINDER: After changing the Area x Zoom to 32 x 8, only adjust the box VERTICALLY.
8.8.1. Change Area x Zoom to 32 x 8 and press Fabrication Start. Run the mill many times to check the edge. Run until the specimen is ~70 nm.
8.8.2. Change Area x Zoom to 32 x 1 and Speed: Rapid. Under the Stage menu, enter 0 degrees to tilt back.
8.8.3. Change Area x Zoom to 32 x 8 and focus. You may need to change to Speed: 5. Click Get Image and measure.
8.8.4. The final specimen should be 50-70 nm.
9. Shut down the FIB after Lift Out. See Shut Down in Operating Procedures under Hitachi FB-2000 FIB.


